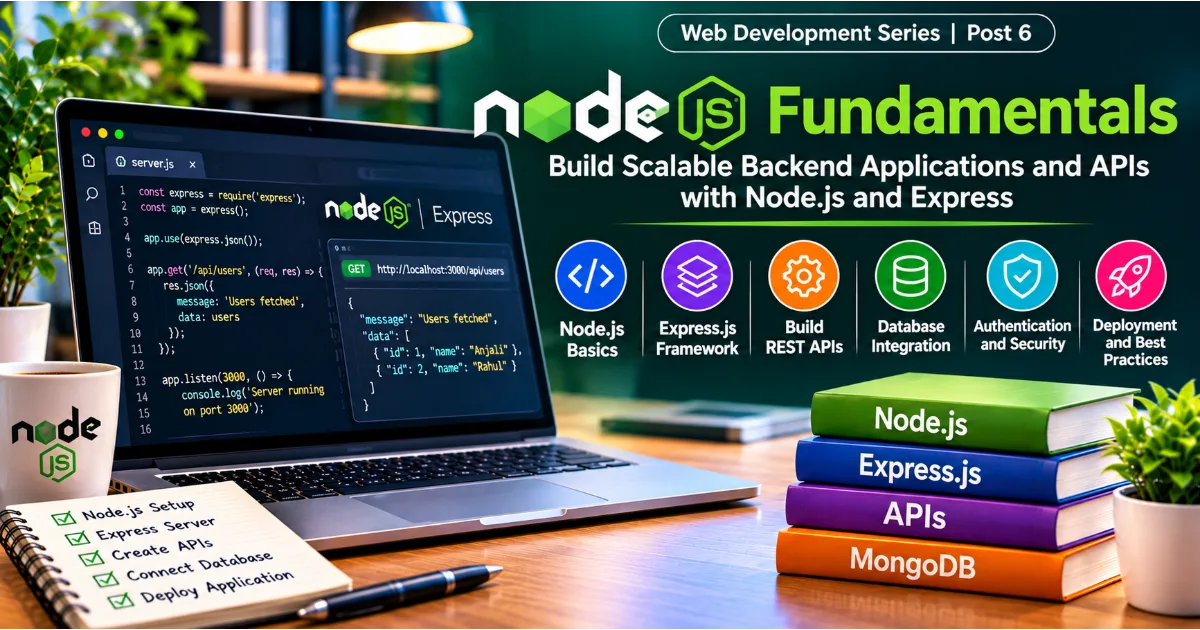
Introduction to Node.js
Modern web applications require more than attractive interfaces and interactive frontend components. When someone creates an account, signs in, publishes a post, uploads a document, makes a purchase, or sends a message, the application must process information, communicate with databases, apply business rules, and return appropriate responses. These responsibilities are generally handled by the backend, which powers the functionality behind the user interface.
Node.js makes it possible to use JavaScript for backend development. Before Node.js became popular, JavaScript was primarily associated with browser-based programming. Node.js expanded its capabilities by providing a runtime environment that allows JavaScript code to execute outside the browser. Developers can now use JavaScript to build servers, APIs, command-line tools, automation scripts, real-time applications, and other backend services.
Node.js is widely used in modern web development because it provides an event-driven, non-blocking input and output model. This approach is particularly useful for applications that handle many network connections, database operations, and other input and output activities. Instead of waiting for one operation to finish before handling another, Node.js can continue processing other work while asynchronous operations are pending.
Node.js is often used with Express.js, a lightweight web framework that simplifies server creation and API development. Together, Node.js and Express allow developers to build backend services that communicate with frontend applications developed using React, Vue, Angular, or standard HTML, CSS, and JavaScript.
Continue Reading
This guide explains Node.js from the beginning, including its architecture, installation, modules, npm, file handling, asynchronous programming, HTTP servers, Express.js, REST APIs, database integration, authentication, security, error handling, testing, deployment, and practical project development. It is designed for developers who want to move beyond frontend development and understand how complete web applications work.
1. What Is Node.js?
Node.js is an open-source JavaScript runtime environment that allows JavaScript to run outside a web browser. It uses the V8 JavaScript engine, which is also used by Google Chrome, to execute JavaScript code.
A runtime environment provides the capabilities required to execute a program. In the browser, JavaScript can access browser-specific features such as the DOM, window object, and browser storage. Node.js provides a different set of capabilities, including filesystem access, networking, process management, and server-side execution.
This distinction is important. Node.js is not a programming language and it is not a frontend framework. JavaScript remains the programming language, while Node.js provides the environment in which the code runs.
For example, a JavaScript program running in a browser can respond when someone clicks a button. A Node.js application can listen for incoming HTTP requests, retrieve information from a database, process the request, and return a response to the browser.
Node.js is commonly used to develop:
Backend services and web servers.
REST APIs and application interfaces.
Real-time messaging systems.
Online collaboration applications.
Command-line development tools.
Automation and background processing.
Streaming and data-processing services.
Server-side applications for ecommerce and SaaS platforms.
Its ability to use JavaScript on both the frontend and backend can make development more consistent, especially for teams that already work extensively with JavaScript.
2. How Node.js Works
To understand Node.js, it helps to understand the difference between synchronous and asynchronous operations.
A synchronous operation generally executes in sequence. If one operation takes a long time, the following operation must wait until it finishes. This can become inefficient when a server handles many requests that involve network communication or database access.
Node.js is designed around an event-driven, non-blocking input and output model. When an application starts an asynchronous operation, Node.js can continue executing other available work instead of waiting for the operation to complete.
For example, suppose a backend application receives a request to retrieve a user's profile from a database. The application sends the database query and waits asynchronously for the result. While the query is being processed, the runtime can handle other available work. When the database operation finishes, its result is processed and the application can send the response.
The event loop is central to this process. It coordinates the execution of JavaScript callbacks and the handling of asynchronous operations. Node.js also uses operating system capabilities and its internal thread pool for certain operations.
Node.js does not mean that every task runs in parallel on multiple JavaScript threads. JavaScript execution in a typical Node.js environment is primarily handled on a main thread. CPU-intensive tasks can still block that thread if they are not managed carefully. Worker threads, child processes, and external services can be used when workloads require additional execution capacity.
Understanding this architecture helps developers choose the right approach for different workloads. Node.js is particularly effective for applications that spend much of their time waiting for network or database operations.
3. Node.js Compared with Browser JavaScript
JavaScript is used in both browsers and Node.js, but the available APIs and responsibilities differ.
Browser JavaScript works within a browser environment. It can interact with the DOM, respond to clicks, modify page content, access browser storage, and communicate with web servers.
Node.js JavaScript runs in a server or local runtime environment. It can access files through filesystem APIs, create HTTP servers, read environment variables, manage processes, and communicate with databases.
For example, the following code is suitable for a browser because it accesses a page element:
const heading = document.querySelector("h1");
heading.textContent = "Welcome!";
The following code uses Node.js filesystem functionality:
const fs = require("node:fs");

fs.writeFileSync("message.txt", "Hello from Node.js");
The first example depends on the browser's document object. The second depends on Node.js APIs.
Developers should avoid assuming that every JavaScript feature available in a browser is automatically available in Node.js, or that every Node.js API can be used in browser code. Each environment provides its own capabilities.
4. Installing Node.js and Setting Up the Development Environment
Before creating a Node.js application, developers need to install Node.js and choose a suitable code editor. Visual Studio Code is a popular choice because it supports JavaScript, debugging, integrated terminals, and extensions.
Node.js installation packages are available for major operating systems. Developers should generally select a supported long-term support release for production-oriented learning and development.
After installation, open a terminal and check the installed versions.
node --version
npm --version
The first command displays the Node.js version. The second displays the npm version. npm is the package manager commonly distributed with Node.js.
Create a project directory and move into it.
mkdir nodejs-learning
cd nodejs-learning
Initialize the project using npm.
npm init -yThis creates a package.json file containing project metadata and configuration. The file becomes an important part of the Node.js application because it records dependencies, scripts, and other project details.
A basic project structure might look like this:
nodejs-learning/
  package.json
  package-lock.json
  server.js
  src/
    routes/
    controllers/
    services/
    middleware/
    models/
  tests/
A small learning project may need only a few files. Larger applications benefit from separating routes, controllers, services, database access, and configuration into appropriate modules.
5. Understanding npm and Package Management
npm stands for Node Package Manager. It is used to install, update, remove, and manage packages that an application depends on.
A package is a reusable collection of code. Developers use packages to avoid building every feature from scratch. For example, Express.js helps create web servers, database packages provide database connectivity, and testing packages support automated tests.
A package can be installed using the following command:
npm install expressThis downloads Express and records it as a project dependency. The package files are stored in the node_modules directory.
The package.json file describes the project and its dependencies. The package-lock.json file records a detailed dependency tree to support consistent installations.
Developers can also install development-only dependencies.
npm install --save-dev nodemonA development dependency is generally used during development rather than required by the application at runtime. Nodemon, for example, can restart a Node.js application automatically when files change.
Scripts can be added to the package configuration.
{
  "scripts": {
    "start": "node server.js",
    "dev": "nodemon server.js"
  }
}
The application can then be started with:
npm run devnpm is an essential part of the Node.js ecosystem. Developers should learn how to inspect packages, understand dependencies, review maintenance status, and avoid installing unnecessary or untrusted packages.
6. Node.js Modules
Modules allow developers to divide an application into separate files and reuse code. Instead of writing all functionality in one large file, developers can create modules for calculations, database operations, authentication, API routes, and other responsibilities.
Node.js supports two major module systems: CommonJS and ECMAScript modules.
CommonJS uses require to import modules and module.exports or exports to expose functionality.
// calculator.js
function add(a, b) {
  return a + b;
}

module.exports = { add };
Another file can import the function.
// app.js
const calculator = require("./calculator");

console.log(calculator.add(10, 20));
ECMAScript modules use import and export.
// calculator.js
export function add(a, b) {
  return a + b;
}
The function can be imported elsewhere.
// app.js
import { add } from "./calculator.js";

console.log(add(10, 20));
A Node.js project can use ECMAScript modules by configuring its package appropriately, commonly through the "type": "module" setting or supported file extensions.
Developers should choose a module system and use it consistently. Mixing systems without understanding their interoperability can create configuration and import-related problems.
Modules improve maintainability because each file can focus on a particular responsibility. This becomes increasingly important as applications grow.
7. Working with the Node.js File System
Node.js provides a filesystem module that allows applications to create, read, update, rename, and delete files.
The filesystem module is useful for log processing, file uploads, configuration handling, report generation, and other server-side operations.
A basic example uses the synchronous filesystem API to write a file.
const fs = require("node:fs");

fs.writeFileSync("notes.txt", "Learning Node.js fundamentals");
The file can be read using:
const content = fs.readFileSync("notes.txt", "utf8");

console.log(content);
Synchronous operations block the JavaScript execution thread until they complete. They can be suitable for simple scripts or startup tasks, but they should generally be avoided in request-handling paths when they could delay other work.
Node.js also provides asynchronous filesystem operations.
const fs = require("node:fs/promises");

async function readNotes() {
  try {
    const content = await fs.readFile("notes.txt", "utf8");
    console.log(content);
  } catch (error) {
    console.error("Unable to read the file:", error.message);
  }
}

readNotes();
The promise-based API works naturally with async and await.
Applications should handle filesystem errors carefully. A file may not exist, permissions may be insufficient, or the storage device may be unavailable. Developers should also avoid allowing untrusted input to determine arbitrary filesystem paths, because careless path handling can expose or modify files outside the intended directory.
8. Asynchronous Programming in Node.js
Asynchronous programming is one of the most important concepts in Node.js development. Backend applications regularly perform operations that take time, including database queries, network requests, file access, and communication with external services.
JavaScript provides callbacks, promises, and async and await to manage asynchronous work.
A callback is a function passed to another function so it can execute after an operation completes. Although callbacks remain useful, deeply nested callback structures can make code difficult to read.
Promises provide a more structured approach. A promise represents an operation that may complete successfully or fail in the future.
function getData() {
  return new Promise((resolve, reject) => {
    const success = true;

    if (success) {
      resolve("Data received");
    } else {
      reject(new Error("Unable to retrieve data"));
    }
  });
}
The promise can be handled using .then() and .catch().
getData()
  .then(result => console.log(result))
  .catch(error => console.error(error.message));
The async and await syntax provides a more readable way to work with promises.
async function loadData() {
  try {
    const result = await getData();
    console.log(result);
  } catch (error) {
    console.error(error.message);
  }
}

loadData();
When multiple independent asynchronous operations need to run, Promise.all() can be useful. It waits for all supplied promises to fulfill and rejects if one of them rejects.
Developers should understand the difference between sequential and concurrent operations. If one request depends on the result of another, sequential execution may be necessary. If operations are independent, running them concurrently can reduce total waiting time.
Asynchronous programming is not simply about making code shorter. It is about managing waiting operations efficiently while keeping the application responsive.
9. Creating a Basic HTTP Server
An HTTP server receives requests from clients and sends responses. A browser, mobile application, or another service can communicate with a Node.js server through HTTP.
Node.js includes a built-in HTTP module that can create a basic server without installing an external framework.
const http = require("node:http");

const server = http.createServer((request, response) => {
  response.writeHead(200, {
    "Content-Type": "text/plain"
  });

  response.end("Hello from Node.js server!");
});

server.listen(3000, () => {
  console.log("Server running on port 3000");
});
Save the code in server.js and run:
node server.jsThe server listens on port 3000. When a client sends a request, the callback receives request and response objects.
The request object contains information such as the HTTP method, URL, and headers. The response object is used to set status codes, headers, and response content.
A server can handle different paths and methods.
const http = require("node:http");

const server = http.createServer((request, response) => {
  if (request.method === "GET" && request.url === "/") {
    response.writeHead(200, {
      "Content-Type": "text/plain"
    });
    response.end("Home page");
    return;
  }

  response.writeHead(404, {
    "Content-Type": "text/plain"
  });
  response.end("Page not found");
});

server.listen(3000);
This demonstrates the basic structure of an HTTP server. However, larger applications usually use a framework such as Express.js to simplify routing, middleware, request parsing, and error handling.
10. Understanding Express.js
Express.js is a lightweight web framework built for Node.js. It simplifies the process of creating web servers and APIs by providing convenient tools for routing, middleware, request handling, and responses.
Express is commonly used for backend applications that expose APIs to frontend clients.
Install Express:
npm install expressCreate a basic Express server.
const express = require("express");

const app = express();

app.get("/", (request, response) => {
  response.send("Welcome to Express.js");
});

app.listen(3000, () => {
  console.log("Express server running on port 3000");
});
The express() function creates an application instance. The app.get() method defines a route that responds to GET requests for the specified path. The app.listen() method starts the server.
Express supports several HTTP methods, including GET, POST, PUT, PATCH, and DELETE. These methods allow an API to represent different operations on application resources.
Express is intentionally flexible. Developers can organize their applications in different ways depending on project complexity and team conventions.
11. Understanding Middleware in Express
Middleware is a function that runs during the request and response processing cycle. It can inspect requests, modify request or response objects, execute additional logic, or pass control to the next middleware function.
Middleware is one of the most important features of Express because it allows common operations to be shared across multiple routes.
For example, an application may need to parse JSON request bodies.
const express = require("express");

const app = express();

app.use(express.json());
This middleware allows Express to parse supported JSON request bodies and make the resulting data available through request.body.
A custom middleware function can log incoming requests.
function requestLogger(request, response, next) {
  console.log(request.method, request.url);
  next();
}

app.use(requestLogger);
The next() function passes control to the next middleware or route handler. If middleware does not send a response and does not call next(), the request may remain unfinished.
Middleware can also be used for authentication, authorization, validation, rate limiting, logging, and error handling.
Middleware order matters. Express processes middleware in the order in which it is registered. Developers should place parsing, security, and logging middleware appropriately and ensure that route-specific middleware runs where required.
12. Building REST APIs with Node.js and Express
An API allows different applications to communicate. A REST API is an approach to designing web interfaces around resources and standard HTTP methods.
For example, an application that manages tasks may provide endpoints for retrieving tasks, creating new tasks, updating existing tasks, and deleting tasks.
A REST-style API might use the following endpoints:
| HTTP method | Endpoint | Purpose |
|---|---|---|
| GET | /api/tasks | Retrieve all tasks |
| GET | /api/tasks/:id | Retrieve one task |
| POST | /api/tasks | Create a task |
| PATCH | /api/tasks/:id | Update a task |
| DELETE | /api/tasks/:id | Delete a task |
The GET method retrieves information. POST commonly creates a new resource. PUT generally replaces a resource, while PATCH updates part of a resource. DELETE removes a resource.
A simple Express route can return JSON.
app.get("/api/tasks", (request, response) => {
  response.json([
    { id: 1, title: "Learn Node.js" },
    { id: 2, title: "Build an API" }
  ]);
});
The response contains an array of task objects. A frontend application can retrieve this information using the Fetch API and display it.
A POST route can accept new information.
app.post("/api/tasks", (request, response) => {
  const { title } = request.body;

  if (!title || !title.trim()) {
    return response.status(400).json({
      message: "Task title is required"
    });
  }

  response.status(201).json({
    id: Date.now(),
    title: title.trim()
  });
});
This example demonstrates basic validation and response handling. A production application should store the task in a database rather than relying on a temporary in-memory value.
Good APIs use meaningful endpoint names, suitable HTTP methods, appropriate status codes, consistent response structures, and clear error messages.
13. HTTP Status Codes and API Responses
HTTP status codes communicate the outcome of a request. They help clients understand whether an operation succeeded, failed because of invalid input, required authentication, or encountered a server problem.
Some commonly used status codes include:
| Status code | Meaning | Typical use |
|---|---|---|
| 200 | OK | Successful request |
| 201 | Created | Resource created |
| 204 | No Content | Successful operation with no response body |
| 400 | Bad Request | Invalid request data |
| 401 | Unauthorized | Authentication required or invalid |
| 403 | Forbidden | User lacks permission |
| 404 | Not Found | Resource does not exist |
| 409 | Conflict | Request conflicts with current resource state |
| 422 | Unprocessable Content | Request understood but validation failed |
| 429 | Too Many Requests | Rate limit exceeded |
| 500 | Internal Server Error | Unexpected server failure |
An API should return status codes that accurately represent what happened. Returning status 200 for every response makes it harder for frontend applications and monitoring systems to identify problems.
Responses should also be consistent. For example, an application might return a structured error object containing a message and an error code. This makes frontend error handling easier and helps maintain predictable communication between systems.
14. Connecting Node.js to a Database
Most real-world applications need persistent storage. A database stores information so that it remains available after a server restarts.
A Node.js application can connect to relational databases such as PostgreSQL and MySQL, or document-oriented databases such as MongoDB.
Relational databases organize information into tables containing rows and columns. They support relationships between tables and commonly use SQL to query data. They are useful for applications that need structured records, transactions, and relationships.
MongoDB stores data in flexible document structures. It is commonly used with Node.js applications that work with JSON-like objects.
A MongoDB application can use a library such as Mongoose to define schemas and interact with collections.
A simple schema might look like this:
const mongoose = require("mongoose");

const taskSchema = new mongoose.Schema({
  title: {
    type: String,
    required: true,
    trim: true
  },
  completed: {
    type: Boolean,
    default: false
  }
});

const Task = mongoose.model("Task", taskSchema);
The schema describes the structure and validation rules for task documents.
A task can be saved using:
const task = new Task({
  title: "Learn database integration"
});

await task.save();
The database connection should be configured securely, and connection errors should be handled. Database credentials must be stored in environment configuration rather than hardcoded into source files.
Choosing a database depends on the application's data model, consistency requirements, query patterns, scalability expectations, and operational needs. No single database is ideal for every application.
15. Environment Variables and Application Configuration
Applications often require configuration values that differ between development, testing, and production environments. Examples include database connection strings, server ports, authentication secrets, and external service credentials.
Environment variables allow these values to be supplied outside the application source code.
Node.js provides access to environment variables through process.env.
const port = process.env.PORT || 3000;

app.listen(port, () => {
  console.log(`Server running on port ${port}`);
});
For local development, packages such as dotenv can load values from a .env file.
npm install dotenvA configuration file might contain:
PORT=3000
DATABASE_URL=your_database_connection_string
The application can load the values:
require("dotenv").config();

console.log(process.env.PORT);
A real .env file containing secrets should not be committed to a public source repository. Developers should use environment-specific configuration and provide a safe example file that describes required variables without exposing actual credentials.
Production environments often provide their own secure configuration mechanisms. These may include hosting platform settings, secret managers, and deployment configuration systems.
16. Authentication and Authorization
Authentication and authorization are essential concepts in backend development.
Authentication verifies who a user is. A typical example is a login process where a user submits an email address and password. The server verifies the credentials and establishes an authenticated session or issues a token.
Authorization determines what an authenticated user is allowed to do. For example, a regular user may be able to read and update their own profile, while an administrator may have additional permissions to manage other accounts.
Passwords should never be stored as plain text. Backend applications should use established password hashing algorithms designed for password storage, such as Argon2 or bcrypt, with appropriate configuration.
Token-based authentication is often implemented using JSON Web Tokens, while session-based authentication stores session state on the server and associates it with a browser cookie. Each approach has different security and operational considerations.
A protected API route should verify the user's identity and permissions before returning sensitive information or performing an operation.
Developers should avoid treating a hidden frontend button as a security control. The backend must enforce authorization independently because clients can send requests directly.
17. Security Best Practices for Node.js Applications
Backend security must be considered throughout application development. A server processes information from browsers, mobile applications, external services, and other systems. Any input should be treated carefully.
Input validation is essential. Applications should verify that submitted information has the expected type, format, length, and allowed values. Validation should happen on the server even when the frontend also validates information.
SQL injection can occur when untrusted input is inserted directly into SQL queries. Developers should use parameterized queries or well-designed database libraries rather than building queries through unsafe string concatenation.
Cross-site scripting can affect applications that return untrusted content to browsers. Applications should encode or sanitize content appropriately and avoid unsafe HTML rendering.
Cross-site request forgery is a concern for certain cookie-based authentication designs. Appropriate protections may include CSRF tokens, secure cookie configuration, and origin checks.
Other useful security measures include:
Use HTTPS for communication.
Apply rate limiting to sensitive endpoints.
Use secure authentication and authorization.
Keep dependencies updated.
Avoid exposing secrets in source code.
Configure security-related HTTP headers.
Validate uploaded files and restrict file types and sizes.
Use least-privilege database accounts.
Log security-relevant events without exposing sensitive data.
Avoid returning internal stack traces to public clients.
Packages such as Helmet can help configure HTTP security headers in Express applications. However, adding a package does not replace a complete security review. Developers should understand the risks relevant to their application and apply appropriate controls.
18. Error Handling and Logging
Errors are unavoidable in backend applications. A database may become unavailable, a request may contain invalid information, a network connection may fail, or an application may encounter an unexpected programming problem.
A reliable application should handle expected errors clearly and prevent unexpected errors from exposing sensitive implementation details.
JavaScript provides try...catch for handling exceptions.
async function getTaskData() {
  try {
    const result = await loadTaskFromDatabase();
    return result;
  } catch (error) {
    console.error("Task retrieval failed:", error);
    throw error;
  }
}
Express applications can use centralized error-handling middleware. This keeps error responses consistent and reduces repeated error-handling code across routes.
function errorHandler(error, request, response, next) {
  console.error(error);

  response.status(500).json({
    message: "An unexpected server error occurred"
  });
}
Error-handling middleware should be registered after application routes. A production application should distinguish expected errors, such as invalid input or missing records, from unexpected internal failures.
Logging is also important. Developers need to understand what happened when a request failed, how long operations took, and whether an application is experiencing repeated problems.
Structured logging tools can help record timestamps, request identifiers, severity levels, and relevant application context. Sensitive information such as passwords, authentication tokens, and private user data should never be written to ordinary logs.
19. Testing Node.js Applications
Testing helps ensure that a backend application behaves correctly. It can detect errors before they reach users and provide confidence when developers change existing code.
Unit tests check individual functions or small units of logic. For example, a function that calculates a discount can be tested with different input values.
Integration tests verify that different parts of an application work together. A test might confirm that an API route can validate a request, communicate with a database, and return the expected response.
End-to-end tests check complete application workflows from the perspective of a client. They can verify registration, login, creating a record, updating it, and deleting it.
Node.js includes a built-in test runner that can be used for many testing needs.
const test = require("node:test");
const assert = require("node:assert");

function add(a, b) {
  return a + b;
}

test("adds two numbers", () => {
  assert.strictEqual(add(2, 3), 5);
});
Testing frameworks such as Jest and Vitest are also used in JavaScript projects. API testing tools can help developers send requests and inspect responses during development.
A good testing strategy should focus on important business rules, validation, permissions, error cases, and critical user journeys. Testing only successful requests is not enough. Applications should also be tested with missing fields, invalid values, unauthorized requests, and unavailable dependencies.
20. Scaling and Performance in Node.js
Node.js can support applications with many concurrent connections, but scalability still depends on application architecture, database design, infrastructure, and workload characteristics.
One important performance concern is blocking the event loop. A long-running CPU-intensive operation can prevent the main JavaScript thread from processing other work efficiently. Developers should avoid performing expensive synchronous operations in request-handling paths.
For CPU-intensive workloads, worker threads or separate processes may be appropriate. Some applications also move heavy processing to background workers so that user-facing API requests can return quickly.
Caching can reduce repeated database queries and expensive computations. A cache may store frequently requested information for a limited period so that the application does not need to recalculate or retrieve it every time.
Database indexes can improve query performance when designed around actual access patterns. Connection pooling helps manage database connections efficiently.
Load balancing distributes incoming requests across multiple application instances. This can improve availability and allow a system to handle more traffic, provided the application and its infrastructure are designed appropriately.
Monitoring is essential for understanding real performance. Developers should measure response times, error rates, CPU usage, memory consumption, event loop delays, and database performance. Optimization should be based on observed problems rather than assumptions.
21. Deploying a Node.js Application
Development is not complete until an application can run reliably in an appropriate environment. Deployment makes the backend accessible to users or other services.
Node.js applications can be deployed to cloud platforms, virtual private servers, container environments, and managed application hosting services.
A basic deployment process includes preparing the application, configuring environment variables, installing production dependencies, connecting the database, setting up the application process, and configuring networking.
The production start command should be defined in package.json.
{
  "scripts": {
    "start": "node server.js"
  }
}
The application can then be started using:
npm startProduction deployments should avoid relying on development-only tools. They should also include appropriate logging, error handling, health checks, security configuration, and monitoring.
Docker is commonly used to package applications and their runtime dependencies into containers. Containers can help make application environments more consistent across development, testing, and deployment.
A reverse proxy can sit in front of the Node.js server to handle tasks such as TLS termination, request forwarding, and certain traffic-management responsibilities.
The deployment approach should match the application's availability requirements, expected traffic, budget, and operational capabilities.
22. Practical Project: Build a Task Management REST API
A practical project is one of the most effective ways to understand Node.js and Express. This example creates a basic task management API with operations for listing tasks, retrieving an individual task, creating a task, updating a task, and deleting a task.
Create a new project directory and initialize npm.
mkdir task-api
cd task-api
npm init -y
npm install express
Create a file named server.js.
Start by importing Express, creating an application, and adding JSON parsing middleware.
const express = require("express");

const app = express();
const PORT = process.env.PORT || 3000;

app.use(express.json());

let tasks = [
  { id: 1, title: "Learn Node.js", completed: false },
  { id: 2, title: "Build an API", completed: false }
];
The first endpoint retrieves all tasks.
app.get("/api/tasks", (request, response) => {
  response.json(tasks);
});
The next endpoint retrieves one task using its identifier.
app.get("/api/tasks/:id", (request, response) => {
  const id = Number(request.params.id);
  const task = tasks.find(item => item.id === id);

  if (!task) {
    return response.status(404).json({
      message: "Task not found"
    });
  }

  response.json(task);
});
The POST endpoint creates a new task.
app.post("/api/tasks", (request, response) => {
  const title = request.body.title;

  if (typeof title !== "string" || !title.trim()) {
    return response.status(400).json({
      message: "A valid task title is required"
    });
  }

  const newTask = {
    id: Date.now(),
    title: title.trim(),
    completed: false
  };

  tasks.push(newTask);

  response.status(201).json(newTask);
});
The PATCH endpoint updates an existing task.
app.patch("/api/tasks/:id", (request, response) => {
  const id = Number(request.params.id);
  const task = tasks.find(item => item.id === id);

  if (!task) {
    return response.status(404).json({
      message: "Task not found"
    });
  }

  if (typeof request.body.title === "string") {
    task.title = request.body.title.trim();
  }

  if (typeof request.body.completed === "boolean") {
    task.completed = request.body.completed;
  }

  response.json(task);
});
The DELETE endpoint removes a task.
app.delete("/api/tasks/:id", (request, response) => {
  const id = Number(request.params.id);
  const originalLength = tasks.length;

  tasks = tasks.filter(task => task.id !== id);

  if (tasks.length === originalLength) {
    return response.status(404).json({
      message: "Task not found"
    });
  }

  response.status(204).send();
});
Finally, start the server.
app.listen(PORT, () => {
  console.log(`Task API running on port ${PORT}`);
});
Run the application:
node server.jsThe API can now be tested using an API testing tool or a frontend application. The GET endpoint retrieves tasks, POST creates a task, PATCH updates it, and DELETE removes it.
This example stores information in memory, so the tasks will disappear when the server restarts. A production version should connect to a database, use stronger validation, include authentication and authorization, apply appropriate rate limits, and add automated tests.
The project can also be expanded with task categories, due dates, user accounts, pagination, search, and filtering. These improvements provide opportunities to practise backend architecture and real-world API development.
23. Common Node.js Mistakes Beginners Should Avoid
Beginners often try to place all backend functionality in one large file. This may work for a small experiment, but it becomes difficult to maintain as routes, validation, database access, and authentication grow. Separating responsibilities into modules makes an application easier to understand.
Another common mistake is blocking the event loop with expensive synchronous operations. Developers should understand which operations are asynchronous and avoid long-running work in request-handling code unless it is managed appropriately.
Poor error handling is also a frequent problem. An application should not assume that every database query, file operation, or external request will succeed. Errors should be handled consistently and safely.
Hardcoding database credentials and API secrets into source code creates security risks. Configuration should be supplied through secure environment settings, and private values should not be committed to public repositories.
Beginners may also install too many packages without understanding their purpose. Every dependency introduces maintenance and security considerations. Developers should choose packages carefully and remove those that are no longer needed.
Finally, many beginners test only the successful path. Real applications must handle missing values, invalid requests, unauthorized access, database failures, and unexpected conditions. Testing these scenarios improves reliability.
24. Node.js Career Opportunities
Node.js is an important skill for developers interested in backend and full stack development. It is used by organizations building web platforms, SaaS products, ecommerce systems, communication tools, dashboards, and internal business applications.
Common job roles include Node.js developer, backend developer, JavaScript developer, API developer, and full stack developer. Depending on the organization, these roles may involve building APIs, connecting databases, implementing authentication, integrating external services, writing tests, and maintaining production applications.
Employers generally expect developers to understand more than basic Express routes. Important skills include JavaScript fundamentals, asynchronous programming, HTTP, REST API design, database concepts, authentication, security, testing, Git, deployment, and debugging.
A strong portfolio should demonstrate complete backend projects. A task management API, ecommerce backend, user authentication service, booking system, or content management API can show practical ability.
Developers should be prepared to explain how their application handles validation, errors, permissions, database operations, and performance. These skills demonstrate that they understand the responsibilities of backend engineering rather than simply knowing how to start a server.
Conclusion
Node.js makes it possible to use JavaScript beyond the browser and build the backend systems that power modern web applications. Its event-driven, non-blocking architecture makes it suitable for many network-oriented workloads, while its ecosystem provides tools for servers, APIs, databases, testing, and deployment.
Understanding modules, npm, asynchronous programming, HTTP servers, and Express.js creates the foundation for backend development. REST APIs connect frontend applications to backend services, databases provide persistent storage, and authentication and authorization protect application resources.
However, building a reliable backend involves more than writing routes. Developers must consider security, validation, error handling, performance, testing, monitoring, and deployment from the beginning.
The best way to learn Node.js is through practical projects. Start with a simple server, build a few API endpoints, connect a database, add authentication, and gradually introduce production-oriented practices. Each step develops a deeper understanding of how web applications work behind the scenes.
Node.js opens the door to backend development while allowing developers to continue using JavaScript. Combined with frontend technologies such as React, it provides a strong foundation for building complete, scalable, and maintainable web applications.
#NodeJS #NodeJSForBeginners #BackendDevelopment #ExpressJS #WebDevelopment